Overview
If you are required to collect and report sales tax on services and/or products, in Sweep&Go you may choose to use one of two sales tax calculator options:
- Manual Calculator
- Automated QuickBooks Calculator
Manual Calculator
To set the sales taxes go to Settings > Billing > Sales Tax section. Manual sales tax calculator is a part of built-in Sweep&Go billing features and it is set by default. To add sales tax rates click on Edit button next to Sales Tax.
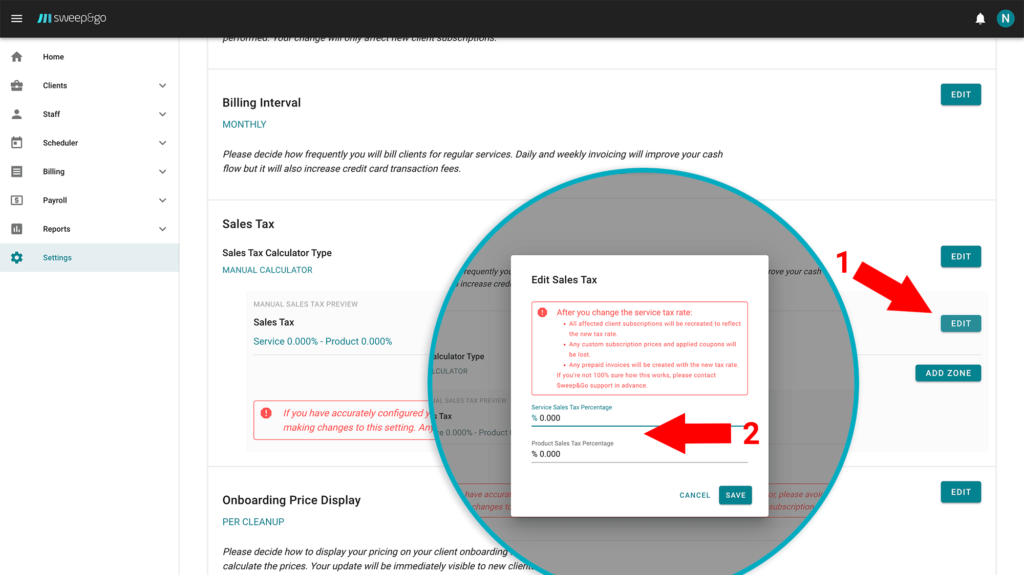
Enter service and product sales tax percentage
If sales tax rates differ throughout different counties or zip codes you should leave main sales tax fields set to 0% and create multiple tax zones. To create tax zones click on the Add Zone button.
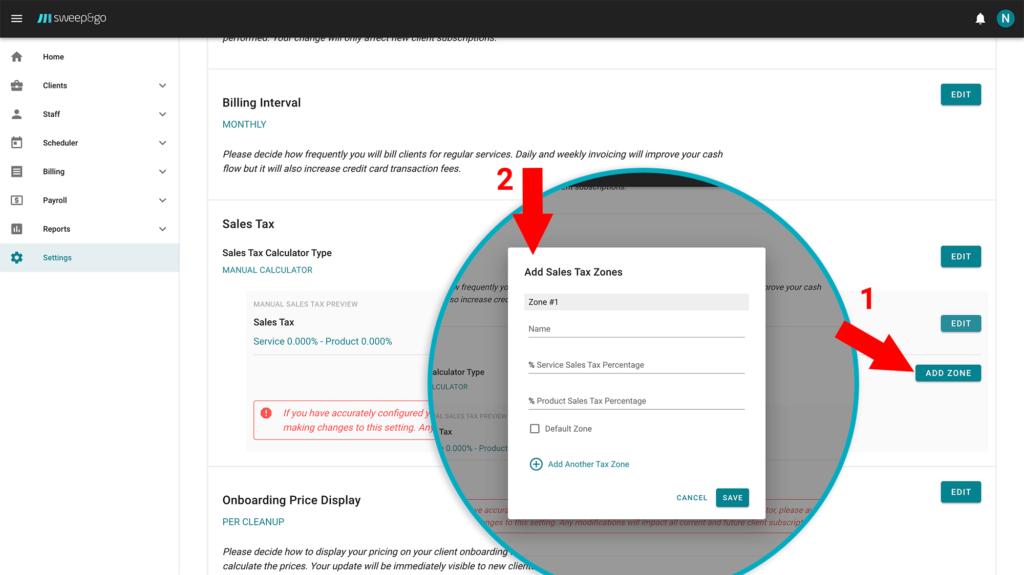
You may create as many tax zones as you need
Enter tax rates as a combined tax rate (which consists of state, county, city and other tax rates). If you accurately configured your sales tax rates please avoid making changes to this setting because any modifications will impact all current and future client subscriptions.
After you set tax rates you will need to assign each client sales tax zone within client details.
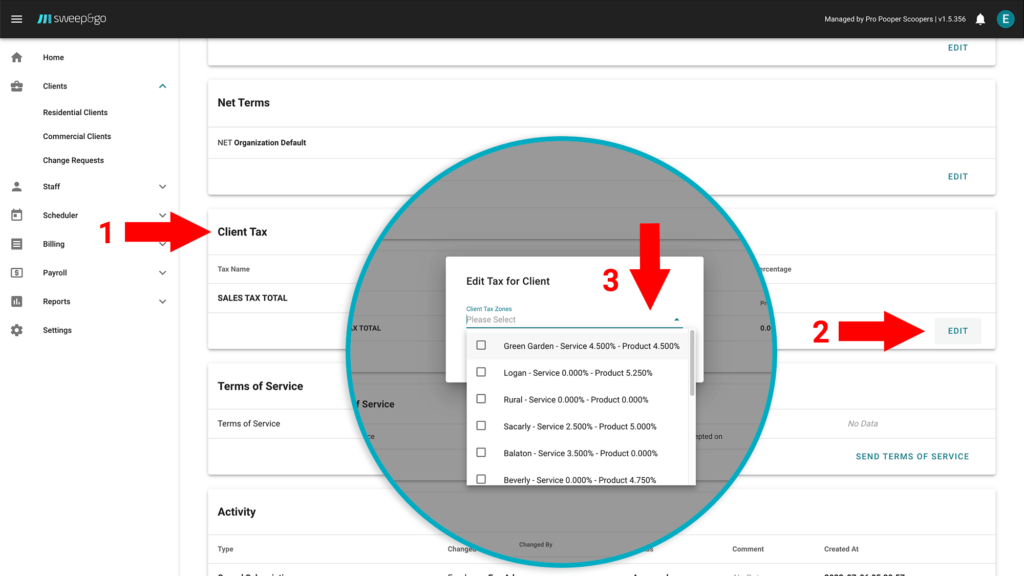
Choose sales tax from dropdown menu
You may also set some zone as a default which will be automatically applied to all new customers and you would change it manually within client details only if a client is from a different tax zone.
Automated QuickBooks Calculator
If your sales tax reporting is more complex, we would recommend using the QuickBooks calculator. To use it you will first have to connect your Sweep&Go account with your QuickBooks Online account. You may find more info about QuickBooks integration in the following tutorial https://www.sweepandgo.com/pooper-scooper-app/tutorials/quickbooks-online-integration/quickbooks-online/ .
QuickBooks Online automatically calculates the total tax rate for each sale based on the following:
- Your customer’s tax-exempt status
- Where you sell and where you ship (a location of sale or the Ship to address you add in an invoice or receipt)
- What you sell
After you connect Sweep&Go account with QuickBooks Online you will need to turn on some sales tax settings in your Quickbooks account. It is necessary to:
- Create sales tax agencies.
Go to Taxes > Sales Tax > Sales Tax Settings. If you already know the group rates, you have the option to create a code. Otherwise, you’ll want to reach out to a tax advisor for an accurate combined code or group rate before setting up sales tax in QBO.
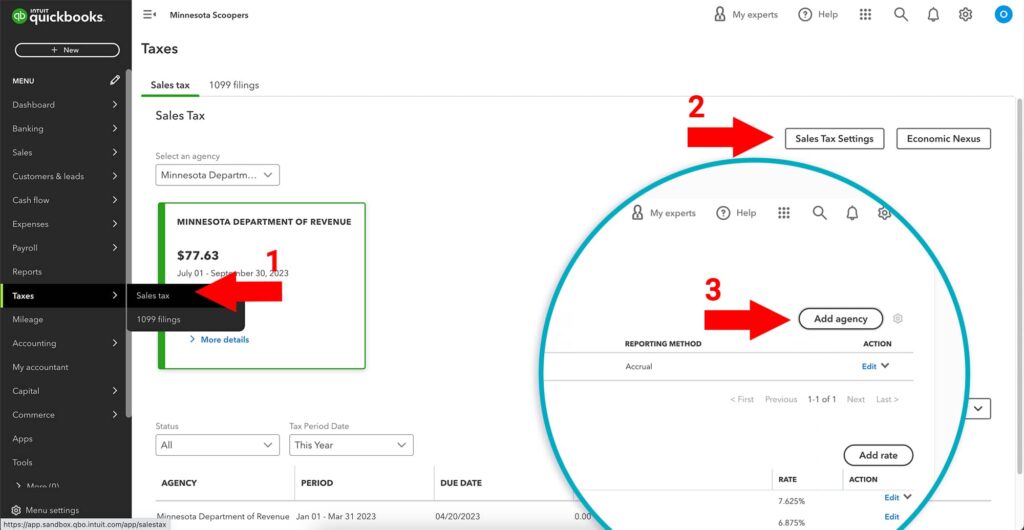
Add sales tax agency
If you did not create a sales tax agency, sales tax will automatically show up and will be assigned to your clients’ entries based on their addresses. Just make sure you add an address in your customer profiles. It will recommend your tax agency and it will ask you to confirm it.
If the program won’t recognize the rate when you make a transaction, you can use the See the math feature to document and correct the tax rate. It will be updated for future transactions.
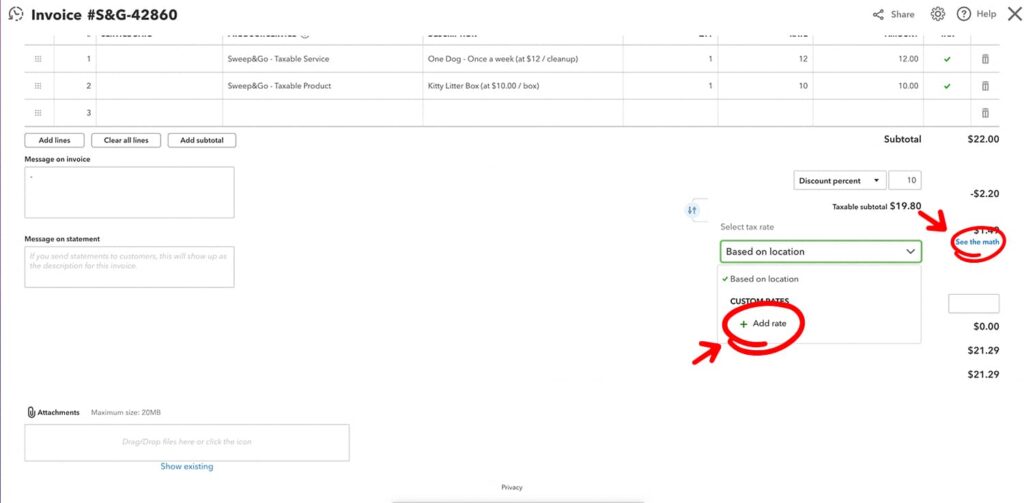
Correct sales tax manually if needed
2. Turn on shipping address
In order to calculate the correct sales tax you will also need to enable shipping address. Go to account settings (gear) > Account and Settings > Sales > enable shipping within Sales form content section.
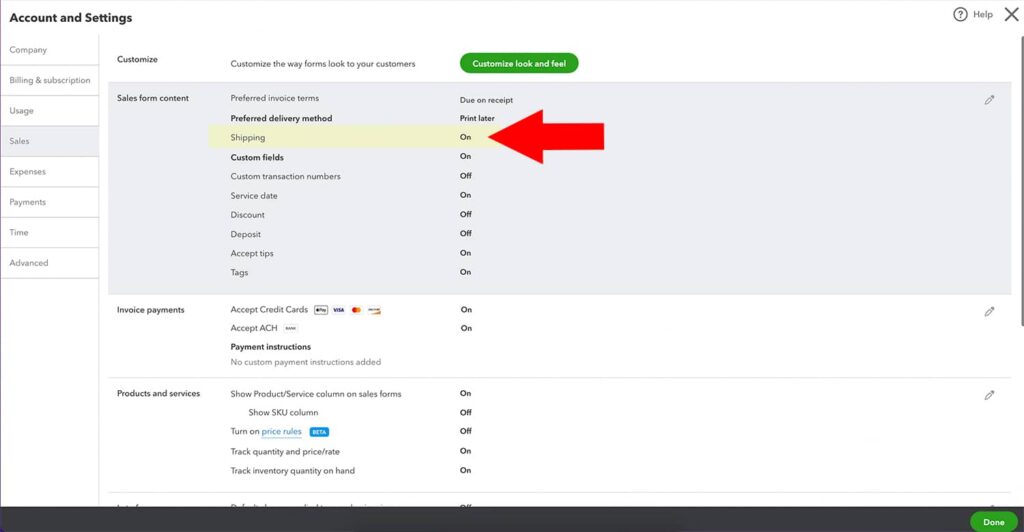
Enable ship to address you add in an invoice
If for any reason the shipping address is missing in the invoice and sales tax is not calculated correctly make sure to add it manually and sales tax will be recalculated.
When you finalize an invoice in Sweep&Go it will be in status Pending until QBO calculates and returns sales tax. After that it will change status to Open.
Sales Tax Report
In a sales tax report you can review total sales per different sales tax zones within a certain time period. With a manual calculator, the tax report will show total sales per tax zones you created. With an automated calculator, the tax report will show tax zones and rates provided by QuickBooks Online. You may find a tax report under Billing > Sales Tax Report.
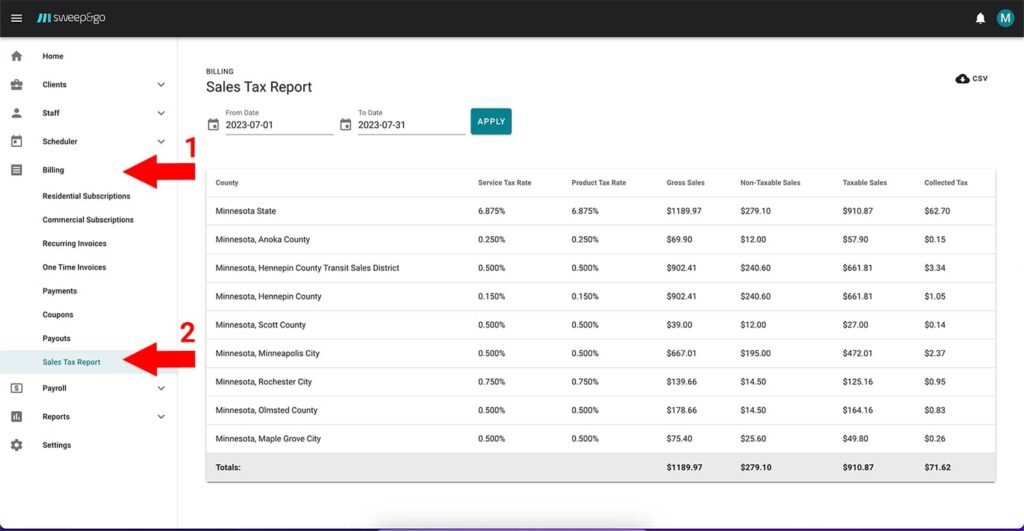
Sales Tax Report
Note: Sales will be shown in the sales tax report based on when the invoice is finalized, not when the invoice draft was created.